For several years now users have been taught to look for the green padlock in the address bar to ensure the site they are using is secure. But certificates are expensive due to the efforts that go in to proving your identity.
Letsencrypt are trying to help secure the web by issuing short term (90 day) certificates to users who can demonstrate through a simple challenge and response that they are in control of a host.
Scenario
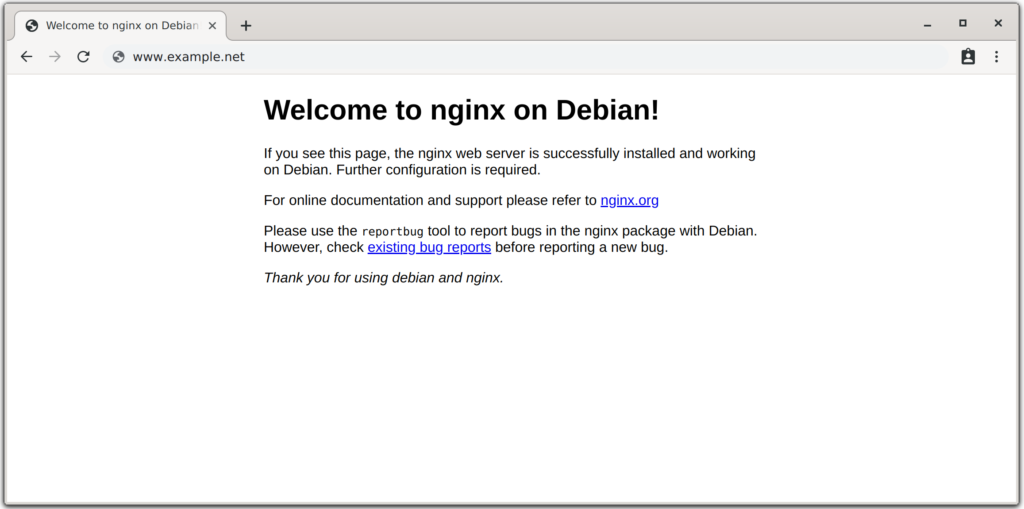
You have a NGINX running on a host with the default Debian configuration. When you visit the host you should see the following page.

As long as you have a publicly accessible host with shell access and you are able to update the NGINX configuration files then you can get free certificates from Letsencrypt.org
Configuration
This process involves adding a snippet to the NGINX configuration so that certbot can manage the challenge and response process.
NGINX
Your out of the box default site in /etc/nginx/sites-available will look something like this.
# Default server configuration
#
server {
  listen 80 default_server;
  listen [::]:80 default_server;

  root /var/www/html;

  # Add index.php to the list if you are using PHP
  index index.html index.htm index.nginx-debian.html;

  server_name _;

  location / {
    # First attempt to serve request as file, then
    # as directory, then fall back to displaying a 404.
    try_files $uri $uri/ =404;
  }
}
which needs to be edited to include the letsencrypt snippet. Include the following inside the server block.
include /etc/nginx/snippets/letsencrypt-acme-challenge.conf;
and finally create the snippet as /etc/nginx/snippets/letsencrypt-acme-challenge.conf
#############################################################################
# Configuration file for Let's Encrypt ACME Challenge location
# This file is already included in listen_xxx.conf files.
# Do NOT include it separately!
#############################################################################
#
# This config enables to access /.well-known/acme-challenge/xxxxxxxxxxx
# on all our sites (HTTP), including all subdomains.
# This is required by ACME Challenge (webroot authentication).
# You can check that this location is working by placing ping.txt here:
# /var/www/letsencrypt/.well-known/acme-challenge/ping.txt
# And pointing your browser to:
# http://xxx.domain.tld/.well-known/acme-challenge/ping.txt
#
# Sources:
# https://community.letsencrypt.org/t/howto-easy-cert-generation-and-renewal-with-nginx/3491
#
#############################################################################

# Rule for legitimate ACME Challenge requests (like /.well-known/acme-challenge/xxxxxxxxx)
# We use ^~ here, so that we don't check other regexes (for speed-up). We actually MUST cancel
# other regex checks, because in our other config files have regex rule that denies access to files with dotted names.
location ^~ /.well-known/acme-challenge/ {

    # Set correct content type. According to this:
    # https://community.letsencrypt.org/t/using-the-webroot-domain-verification-method/1445/29
    # Current specification requires "text/plain" or no content header at all.
    # It seems that "text/plain" is a safe option.
    default_type "text/plain";

    # This directory must be the same as in /etc/letsencrypt/cli.ini
    # as "webroot-path" parameter. Also don't forget to set "authenticator" parameter
    # there to "webroot".
    # Do NOT use alias, use root! Target directory is located here:
    # /var/www/common/letsencrypt/.well-known/acme-challenge/
    root         /var/www/letsencrypt;
}

# Hide /acme-challenge subdirectory and return 404 on all requests.
# It is somewhat more secure than letting Nginx return 403.
# Ending slash is important!
location = /.well-known/acme-challenge/ {
    return 404;
}
We need to create the directory referenced by the snippet and make sure it is readable by NGINX
root@host:~# mkdir /var/www/letsencrypt

root@host:~# chown www-data. /var/www/letsencrypt
As ever with changes to NGINX, it is wise to check the config before reloading the service.
root@host:~# service nginx configtest
[ ok ] Testing nginx configuration:.

root@host:~# service nginx reload
Certbot
Install certbot
root@host:~# apt-get install certbot
Now we must request a certificate for our host; certbot will handle the challenge and response process using the letsencrypt directory which we have just configured NGINX to serve.
root@host:~# certbot certonly --webroot -w /var/www/letsencrypt -d www.example.net
If this is the first time running certbot, then you will have to provide some contact details and accept their T&C’s. You will soon see if the command has completed successfully, but the following command will always list all certificates on the current host.
root@host:~# certbot certificates

Saving debug log to /var/log/letsencrypt/letsencrypt.log

 Found the following certs:
   Certificate Name: www.example.net
     Domains: www.example.net
     Expiry Date: 2019-12-12 16:31:33+00:00 (VALID: 89 days)
     Certificate Path: /etc/letsencrypt/live/www.example.net/fullchain.pem
     Private Key Path: /etc/letsencrypt/live/www.example.net/privkey.pem
NGINX again
Now that we have the certificates and their paths, we need to update NGINX to serve them. Update the default site to look similar to below
# Default server configuration
#
server {
  listen 80 default_server;
  listen [::]:80 default_server;

  root /var/www/html;

  # Add index.php to the list if you are using PHP
  index index.html index.htm index.nginx-debian.html;

  server_name _;

  location / {
    # First attempt to serve request as file, then
    # as directory, then fall back to displaying a 404.
    try_files $uri $uri/ =404;
  }
}

server {
  listen 443 ssl default_server;
  listen [::]:443 ssl default_server;

  ssl_certificate /etc/letsencrypt/live/www.example.net/fullchain.pem;
  ssl_certificate_key /etc/letsencrypt/live/www.example.net/privkey.pem;

  root /var/www/html;

  # Add index.php to the list if you are using PHP
  index index.html index.htm index.nginx-debian.html;

  server_name _;

  location / {
    # First attempt to serve request as file, then
    # as directory, then fall back to displaying a 404.
    try_files $uri $uri/ =404;
  }
}
Final check that our config is correct, and reload NGINX.
root@host:~# service nginx configtest
[ ok ] Testing nginx configuration:.

root@host:~# service nginx reload
Looking forward
Certbot, once installed will take care of renewing the certificate automatically some time before its expiry. You will receive an email to the address you provided if there has been any problem renewing the certificate.
