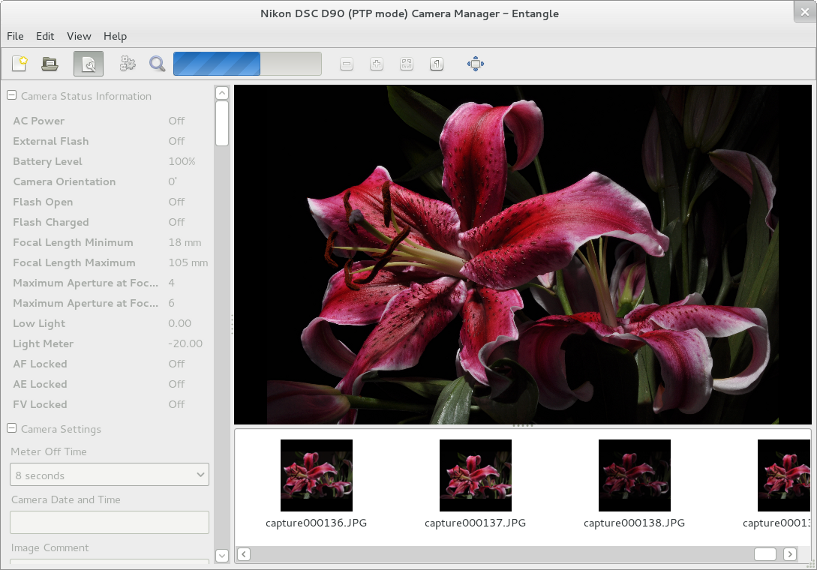
I recently wrote about using gphoto2 to both set Owner and Copyright information on a DSLR, and using it for tethered shooting. For those of you who are adverse to command lines, the very promising Entangle is now in Debian unstable.
Continue reading “Tethered shooting with Entangle”Blog
Tethered shooting with gphoto2
Tethered shooting with a DSLR (shooting directly to a connected computer via a USB cable) on Linux is very, very easy, assuming you have gphoto installed.
gphoto2 --capture-tethered
And start shooting away! However, I wanted to be a bit cleverer and improve my workflow slighty to overcome a few shortcomings. I wanted to:
- Shoot raw
- Display the last shot full-screen.
- Not clobber existing files if I re-ran the tether.
it turns out that this is all easy to do with a small bash script and gphoto’s “hook” capabilities. I knocked up the following based upon the sample distributed with gphoto and called it hook.sh.
Continue reading “Tethered shooting with gphoto2”GIMP xcf file size reduction

If you are a GIMP user you can end up with plenty of .xcf files. I do all my editing with xcfs after importing from RAW with the excellent ufraw-gimp plugin. But they can get pretty big…
Step forward bzip2. If you are running linux, you will already have bzip installed, and the bonus is that GIMP can read and write natively its xcf files compressed with bzip. There is a small performance hit on opening and saving files, but you can save 10-40% of file-size; that can easily be 40 MiB for a simple file with a couple of layers.
Continue reading “GIMP xcf file size reduction”Updating camera settings with gphoto2
gphoto2 is a cool little command line utility to remotely control many digital cameras and their settings. Grab it out of your repository, connect your camera by USB, turn on and enjoy.
Continue reading “Updating camera settings with gphoto2”Superquick thumbnails in Gnome 3 for raw camera files
I do most of my shooting in Canon Raw (*.CR2) and convert to jpeg for display, but my Debian Testing system won’t show thumbnails for them: until now. And as a bonus, it’s dead simple to do and they are produced really quickly.
Continue reading “Superquick thumbnails in Gnome 3 for raw camera files”Postfix and DKIM
openDKIM and Postfix on Ubuntu Server 12.04LTS
You probably found this post because you already know what DKIM is and want to implement it, but for those of you who need more information Wikipedia has a good entry on the subject;
This little walkthrough has been based upon a Ubuntu 12.04LTS server with Postfix; your mileage may very depending on your setup. At a minimum you will need:
- Root access to your mail server
- Access to update the dns records for your domain
Firstly, install opendkim from the repositories. There is some good information available there too.
sudo apt-get install opendkim
You must decide on what “selector” you wish to use. The selector is essentially a word to describe the key you wish to use. Here I am going to use the selector 201204 as the key became valid in April 2012 (cunning eh?). Obviously, my domain will be brabeum.com.
Setup
So onward. Generate the keys in your home directory, using your chosen selector and domain.
opendkim-genkey -s 201204 -d brabeum.com
This will create two files, 201204.txt and 201204.private containing the public and private keys respectively. You must publish the content of the public key to your authoritative DNS server. Three things to note;
- openDKIM 2.5.2 on Ubuntu omits the k= after v=DKIM1;
- you should add the t=y flag to indicate to receiving servers that you are testing DKIM but not actively using it yet.
- You should use a short TTL (time to live) so that you can change the key without waiting ages for it to propagate though DNS.
DNS implementations vary, but you should end up with an entry something like this (I’ve shortened the key because of line breaks);
201204._domainkey IN TXT v=DKIM1; k=rsa; t=y; p=MIGfM..[snip]..QIDAQAB
Remember to reload your DNS configuration after addition.
Now, test the key…
opendkim-testkey -d brabeum.com -s 201204 -k 201204.private -vvv
And you should get output similar to below.
opendkim-testkey: key loaded from 201204.private
opendkim-testkey: checking key '201204._domainkey.brabeum.com'
opendkim-testkey: key not secure
opendkim-testkey: key OK
Note that opendkim is reporting that the key is not secure. This relates to the fact that DNSSEC is not implemented on my DNS server and theoretically somebody could intercept the DNS lookup and replace it with their own key.
Once we are happy with the key test, move the private key to /etc/mail
cd /etc/mail
sudo mv /home/basil/201204.private .
Setup openDKIM by editing /etc/default/opendkim with your favourite editor and add the following line to the end.
SOCKET="inet:8891@localhost"
Then edit /etc/opendkim.conf and add the following lines
Domain                  brabeum.com
KeyFile                 /etc/mail/201204.private
Selector                201204
And restart opendkim
sudo service opendkim restart
Lastly we configure postfix. Edit /etc/postfix/main.cf and add the lines to the end
smtpd_milters=inet:localhost:8891
non_smtpd_milters=inet:localhost:8891
And restart
sudo service postfix restart
Testing
So now you need to send some test messages through your newly configured postfix server. At the receiving end you should see some new headers, one of which will show similar to below (note that Google recognize it as test mode as we still have the t=y flag applied).

Once you are happy that all is well, you can remove the testing flag and increase TTL.
Done!
Donate your spare CPU cycles to Folding@home
If you have never heard of it, Folding@home is a distributed computing effort run by the Pande lab at Stanford University researching the “folding” of proteins. The idea is simple; instead of building an expensive supercomputer to model protein folding, allow ordinary people to donate their spare CPU cycles.
Most modern computers spend an inordinate amount of time at idle; even my ancient laptop with its Mobile Pentium 4 at 2.66Mhz is usually showing in excess of 85% idle when running no applications on Natty. FAH (as Folding@home is usually abbreviated to) aims to use this spare capacity of hundreds-of-thousands of machines around the world and you can contribute too.
Continue reading “Donate your spare CPU cycles to Folding@home”Securing Apache for free with SSL and StartSSL

So you have a web-server and you want to serve content by SSL? If you have found you way to here, you have probably discovered that browsers such as Firefox do not make it easy to use self-signed certificates; large scary error messages do not inspire confidence in most users. But there is an easy answer – StartSSL.
Continue reading “Securing Apache for free with SSL and StartSSL”